


Image Editor - Art AI Photo
4.114.00 Reviews
App Specs
- Version
- 1.1.5
- Updated On
- License
- Free
- Downloads
- 5,000,000+
- Developer
- Zeronebula Studio
- Categories
- Photography
- Platform
- Android
Screenshots
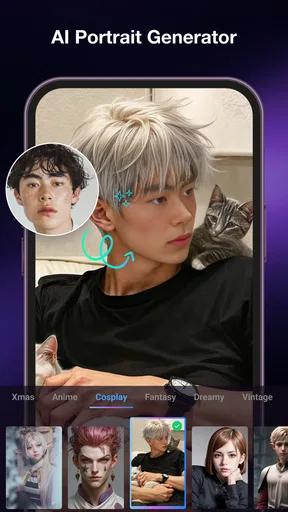
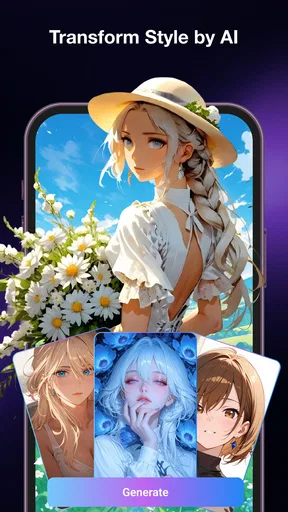
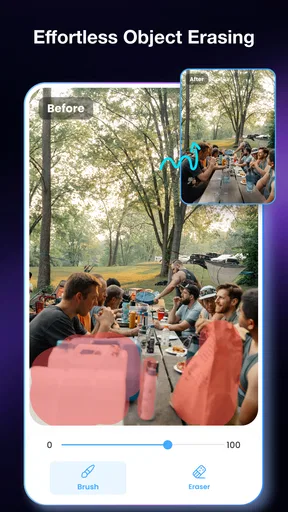
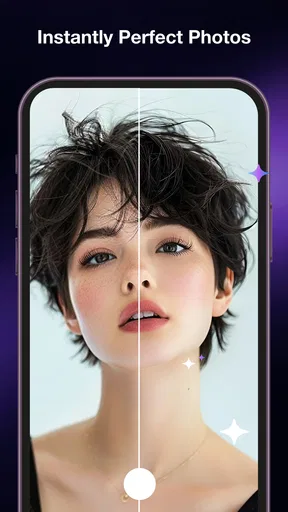
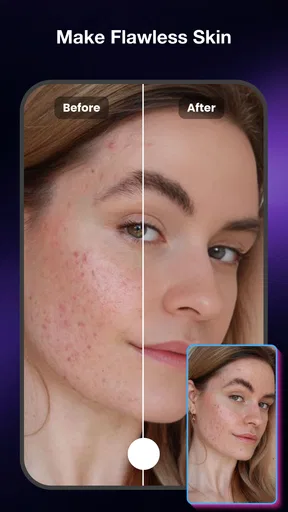
 Analysis by AppCompare
I would approach Image Editor - Art AI Photo as a quick way to give an ordinary picture a more expressive look, rather than as a replacement for a full desktop editing setup. It is a photography app from Zeronebula Studio, and its focus is easy to grasp: start with an image, explore creative treatments, and see whether one suits the moment. For a first-time user, that simple goal is useful; you do not need to arrive with a detailed editing plan.
My practical recommendation is to begin with a photo you already like and make one change at a time. A portrait, a café snapshot, or a picture from a walk gives you something familiar to judge. The key is not to chase the most dramatic result immediately. A filter can look exciting on its own but overwhelm the subject, so compare the edited image with the original and keep the version that still feels like your photo.
What to expect from this photo editor
Image Editor - Art AI Photo is positioned around artistic effects and AI-assisted editing, so I would expect it to appeal most to people who want a quick visual transformation. It is not the kind of tool I would choose first for precise color correction, a careful skin retouch, or a layered composition. Its strength is the invitation to experiment without turning a casual edit into a technical project.
The app has a 4.1 average from around 2.6 thousand ratings, and it has passed 5 million installs. Those figures suggest that it has found a broad audience, though popularity alone cannot tell you whether its particular style will suit your taste. Its 14 written reviews are a much smaller pool of detailed feedback, so I would judge it by trying a photo that matters little before committing to a bigger editing workflow.
The app is free and rated for Everyone, which makes it approachable for casual use and family devices. It is currently at version 1.1.5 and requires Android 8.0 or later. If you are using an iPhone or another platform, check the relevant store before planning around it; the Android compatibility details do not establish availability or requirements elsewhere.
One useful way to think about it is as a creative layer in your photo routine. Your phone’s built-in editor is often better for straightforward cropping, brightness, and quick corrections. A larger, more established photo suite may be preferable when you need selective adjustments or a repeatable professional look. This app makes more sense when your question is, “Could this picture be more playful or artistic?”
Start with a photo that makes comparison easy
Choose an image with a clear subject and a background you can still recognize. That gives you a fair test of whether an effect improves the picture or merely changes everything at once. A simple portrait is especially helpful: check whether the face remains the focus, whether the background becomes distracting, and whether the overall mood still matches the moment.
Worth Reading Before You Choose
Flipboard Shows What News Apps Must Do Beyond the Feed

Switching to Android Auto Means Rethinking Your Driving Routine
Google Calendar Makes a Crowded Week Easier to Manage
Ludo King Makes the Most of the Minutes Between Plans

Baby Panda World Brings Quick Play to Modern Phones, but Its Game Library Feels Busy

ESPN’s Live Game View Makes Following Close Games Easier
For a first try, avoid an image that is already heavily edited or poorly lit. If a result feels muddy, it can be hard to know whether the effect is responsible or the original photo. Starting with a reasonably clear image gives you a more useful first impression and makes it easier to decide what kind of treatment you actually enjoy.
From install to your first satisfying edit
After opening the app, the sensible first move is to select a photo you are comfortable experimenting with. Then browse the available creative treatments and apply one that seems close to the mood you want. The exact controls and available choices can change between releases, so I would avoid building expectations around a particular tool or preset before seeing what is on your screen.
Here is a realistic first-session goal: take a snapshot of a drink or a small plate from a weekend café visit and make it feel a little more like a keepsake. Try a restrained treatment first, then compare the edited view with the original. If the color treatment steals attention from the food or makes the setting feel unlike the actual place, back off and try a different direction. The successful edit is the one that adds character without erasing the memory.
My most useful first-edit tip is to judge the subject and the mood separately. First ask whether the main subject is still clear; then ask whether the new look fits what you want to share. This prevents a striking effect from winning simply because it is striking. It also gives you a repeatable way to evaluate the app rather than tapping through options at random.
Once you have a version you like, save or export it using the options available in the app, then check the result in your usual photo gallery before sharing. That extra check is worthwhile because an edit can look different when viewed outside the editing screen. It also helps you confirm that you have kept the version you intended, particularly if you are trying multiple looks on the same picture.
Common points of confusion during experimentation
The biggest source of uncertainty in an AI-oriented editor is often the word “AI” itself. It can describe different kinds of image processing, and it does not automatically mean every effect understands the scene or preserves every detail. Treat each result as a suggestion: inspect faces, small objects, edges, and text in the image before deciding that the edit is ready to share.
Another common mistake is comparing a heavily stylized result with the original as if one must be objectively better. They serve different purposes. A bold treatment may be fun for a social post, while a natural version may be the better choice for a family album or a picture where accurate color matters. Keep the intended use in mind instead of expecting one edit to work everywhere.
If an effect changes more than you wanted, do not keep stacking new looks in an attempt to repair it. Return to the original or choose a simpler treatment, then make a fresh comparison. This is a practical trade-off with creative editors: experimentation can produce distinctive results, but too many successive changes can make it difficult to tell what improved the image.
People also often wonder whether a free editor is enough for regular use. For occasional creative edits, it can be a comfortable place to start, especially if you are testing whether artistic treatments fit your style. If you need exact control, dependable batch work, or a consistent visual identity across many images, compare it with a dedicated editor before moving your whole workflow over. Those needs are different from simply finding an appealing look for one photo.
Because this app is free, I would still make a habit of checking the current in-app choices before relying on it for a time-sensitive task. Features and workflows can change as an app is updated, and the version on your device may not present exactly the same experience as an earlier one. For a relaxed evening edit, that is a minor consideration; for a project with a deadline, test the steps beforehand.
Who will enjoy it, and who may prefer another tool
I would recommend giving it a try if you mostly edit on your phone, enjoy trying different visual moods, and want a low-pressure way to see what an artistic treatment can do. It is particularly suited to casual portraits, travel snapshots, and small everyday scenes where a creative finish matters more than technical precision.
I would look elsewhere if your main goal is to correct exposure carefully, preserve exact product colors, remove small distractions with precision, or apply the same edits to a large set of images. A standard phone editor may be quicker for basic fixes, while a more comprehensive photo app can offer a better fit for detailed adjustments. The best choice depends on whether you want exploration or control.
It may also not be the right pick if you dislike stylized results and want your pictures to remain close to what the camera captured. In that case, a simple crop and light adjustment in your device’s built-in tools could be all you need. There is no benefit in adding an artistic filter just because an editor makes it easy to do so.
Choosing the right image for a real-life moment
For a small business owner photographing handmade items, I would treat the app as a way to create an occasional mood-led post, not as the final check for a product listing. An expressive finish can help a behind-the-scenes photo feel warm and personal, but a customer deciding on color or finish needs an accurate view. Keep a straightforward original for practical information, and reserve stylized edits for storytelling.
It can also suit someone sorting through travel pictures after a day out. Rather than applying one look to every image, pick a single frame that has a clear subject and use it as a visual accent in a collection. That restraint helps the edited shot feel intentional instead of making a whole album look inconsistent. If you are preparing many photos at once, a batch-oriented editor is likely the more efficient choice.
When editing a portrait for a profile or a family message, inspect the face before judging the overall effect. A dramatic treatment may make the picture feel polished at first glance while changing skin tones or drawing attention away from expression. If the person no longer looks like themselves, I would choose a gentler result or leave the image natural. The aim is to support the memory, not disguise it.
A few habits that make experimentation more useful
One low-effort workflow is to decide on the destination before editing: a private album, a casual social post, or an image that needs to communicate factual detail. That choice gives you a sensible standard for how far to push the style. A playful post can tolerate a stronger visual shift; a reference photo should remain easier to interpret.
I would also avoid judging an effect only from a tiny preview. Open the finished image at a comfortable viewing size and check the areas that matter for that particular photo: a face, lettering on a sign, the edge of a pet’s fur, or the shape of an object. This quick inspection can catch awkward changes that disappear while you are browsing options but become noticeable once the image is shared.
If you are unsure whether an edit is too strong, take a short pause and look again. Creative effects can feel fresh while you are tapping through them, and that novelty can make a heavy treatment seem better than it is. A brief reset helps me decide whether the image still communicates the moment clearly. This is especially useful when I am editing several versions of the same picture.
A good next step after the first edit
Once you know which kinds of effects feel right, make a small personal test set: one portrait, one outdoor scene, and one object or meal. Use the same careful comparison on each. You will quickly learn whether the app’s creative direction works better with people, scenery, or close-up subjects, and that knowledge is more useful than judging it from a single lucky result.
For anything you plan to post publicly, check the finished image at normal viewing size and make sure the subject still reads clearly. For a private memory, you can be more adventurous. Keeping those two purposes separate is a simple workflow improvement: preserve a natural version for reference, then use the more expressive edit when the mood calls for it.
My overall view is that Image Editor - Art AI Photo is worth trying when you want a quick creative detour, not when you need a dependable replacement for every editing tool on your phone. Its appeal is the chance to experiment with artistic looks without making photo editing feel like a chore. Start with an uncomplicated picture, make one change, and trust your own comparison. If the result feels more like the moment you wanted to capture, the app has done its job; if you need finer control, move on to a more precise editor.
Pros
- Offers AI-powered tools for creating and editing images.
- Useful for quick edits without needing advanced design skills.
- Combines photo editing with creative
- art-focused features.
- Can help turn ordinary photos into more stylized images.
- Suitable for experimenting with different visual ideas.
Cons
- AI results may not always match the prompt or intended look.
- Some features or content may require payment or a subscription.
- Image generation and processing can take time on slower devices.
- Editing options may feel limited for detailed
- professional workflows.
- Results and available features may depend on an internet connection.
FAQs for Image Editor - Art AI Photo
What can you do with Image Editor - Art AI Photo?
Image Editor - Art AI Photo is designed for editing pictures and creating artistic results with AI-assisted effects. Depending on the tools available in your version, you may be able to adjust or enhance an image, apply creative filters, and transform a photo into a different visual style. Check the app’s current listing and in-app tool descriptions before downloading, since features can vary by release and device.
Is Image Editor - Art AI Photo free to use?
The app may be available to download without an upfront charge, but some editing tools, effects, or other features could require a purchase or subscription. Review the store listing for current pricing, in-app purchases, and trial terms before installing. If you start a subscription, check its renewal and cancellation details in your Apple or Google account settings to avoid unexpected charges.
Do I need an internet connection to edit photos?
Basic editing may work offline, but AI-powered effects can depend on an internet connection because image processing may take place online. Availability can also vary by feature and app version. If you plan to edit while traveling or have limited data, test the tools you intend to use while connected first, and check whether the app explains which processing options work offline.
What happens to the photos I upload or edit?
Before selecting personal images, review the app’s privacy policy and the permissions it requests. Some features may need access to your photo library, and AI processing may involve sending an image to an online service. The exact handling of images depends on the developer’s policies and the feature used, so check how uploads, storage, and deletion are addressed before sharing sensitive photos.
Is Image Editor - Art AI Photo available for Android and iOS?
Availability depends on the developer’s current release and the country or region associated with your store account. Search for the exact app name in Google Play or the Apple App Store, then confirm the developer, supported operating system, device requirements, and recent update date. Using the official store listing helps you avoid unofficial downloads and shows whether the app is compatible with your device.


